Lost in the wild? Two simple ways to find north before panic sets in
When British explorer Tristan Gooley teaches people how to cross a city park without a map, he starts with the same skills that can calm a lost hiker deep in the woods. The core idea is simple: if you can find north quickly, you can turn panic into a plan. I want to show how two basic techniques, one using the Sun and one using the stars, give you that lifeline long before you reach for a rescue call.
These methods rely on patterns that have guided travelers for thousands of years, from early sailors watching Polaris to modern hikers watching their own shadows. With a straight stick, a few small stones, and a clear view of the sky, you can build a rough compass in minutes and keep yourself moving in a steady direction instead of walking in anxious circles.
Why finding north matters before fear takes over

When someone realizes they are off trail, fear rarely arrives as a cinematic jolt. It creeps in as small, frantic decisions: turning back without checking landmarks, pushing on “just a bit farther,” or circling a hill because the trees all look the same. I have seen that spiral begin on short day hikes and even in city parks, where people lose track of exits once they stop paying attention to the Sun and the shape of the land. A fast, repeatable way to find north cuts through that rising anxiety by giving you a fixed reference point.
Survival instructors often describe how people who lack any sense of direction start to walk in loops, convinced they are holding a straight line. Once you can point to north, even roughly, you can pick a bearing, relate it to where you last saw a road or river, and check whether you are drifting. That mental anchor matters as much as the physics of the sky. It turns the forest from a featureless wall of trees into a map you can read and, just as importantly, it slows your breathing enough to make better choices about water, daylight and energy.
Reading Nature’s Directional Clues before you touch a stick
Before I ever plant a stick in the ground, I start by scanning what one guide calls Nature, Directional Clues The, the quiet signals that surround you whenever the sky is visible. Trees often show thicker moss or more lichen growth on the side that stays cooler and damper, which in many northern forests is the one that faces away from the strongest Sun. Snow lingers longer on slopes that receive less direct light, while south facing hillsides often look patchier and more open. Each of these hints is rough on its own, but together they suggest which side of the horizon the Sun favors.
Animal paths and human tracks can also hint at orientation, especially near water. Trails that contour along a hillside may follow the easiest gradient, while those that cut straight up or down often point toward a ridge or valley that lines up with prevailing light. The key is not to treat any single sign as a compass, but to build a quick mental sketch from several of these natural patterns. Once you have that sketch, the more precise methods with Sun and stars can confirm or correct your first impression.
Using the Sun’s daily path as your first rough guide
In open country or even a city park, the Sun is your quickest reference. Tristan Gooley teaches people to Use the star as if they were crossing a meadow: the Sun rises roughly in the east and sets roughly in the west for much of the year, which means its position in the sky can anchor your sense of direction even before you build anything on the ground. Earlier in the day, the Sun will sit closer to the eastern half of the sky, and later it will drift toward the west, with its height changing by season and latitude.
In the Northern Hemisphere, that path always arcs across the southern side of the sky, so if you face the Sun at midday, south is roughly in front of you, north roughly behind. One outdoor writer notes that you can simply Use the Sun if it is out and keep track of how its angle shifts as you walk, adjusting your path to keep a consistent relationship with that bright reference. Over a short hike, this simple awareness can keep you from veering too far off a chosen line, especially if you combine it with obvious landmarks like ridgelines, rivers or a distant radio tower.
The Shadow Tip Method: turning sunlight into a ground-level compass
When you need more precision than “roughly east” or “roughly west,” the classic Shadow Tip Method Find gives you a repeatable way to draw an east west line on the ground. I start by finding a straight stick about as long as my arm and planting it vertically in level soil or sand. The tip of its shadow becomes my first reference point. I Mark the spot with a small stone or a scratch so I can return to it, then wait for the Sun to move the shadow a few centimeters.
After ten to fifteen minutes, the stick’s shadow will have shifted, and I Mark the new tip with a second stone. The line connecting those two marks runs approximately west to east, with the first mark indicating the westerly point and the second the easterly point, as described in detailed guides that show how to draw a straight line between the marks for your east west line. Once that line is clear, I can stand with the first stone on my left and the second on my right, which points my body toward true north. This simple construction turns the moving Sun into a ground level compass that works even when the sky offers no obvious sense of orientation.
Why the moving shadow trick works in the first place
Understanding the logic behind the shadow trick makes it easier to trust when you are tired or stressed. The method works because the Sun appears to move from east to west across the sky each day, which means any vertical object will cast a shadow that sweeps in a predictable arc. In the morning, that shadow points roughly west, and as the Sun climbs and slides, the tip drifts eastward. By capturing two positions of that moving tip, you are essentially drawing a time stamped record of the Sun’s journey on the ground.
One outdoor educator explains that this predictable motion lets you build a simple “shadow compass” in the Northern Hemisphere when the Sun is visible, with the first mark always closer to the west side of the sky and the second closer to the east. A short video demonstration notes that This method works because the Sun appears to move east to west across the sky, causing the shadow to shift in a consistent way that you can harness with nothing more than a stick and a few stones. Once you grasp that pattern, you can adapt the technique to different surfaces, from desert sand to a city playground.
Step by step: building a shadow compass when every minute feels long
In a stressful moment, clear steps matter more than theory. I follow a simple script. First, I find a straight stick about three feet long and plant it as upright as possible in a patch of level ground. Then I crouch down and place a small rock right at the tip of its shadow, or scratch that point into the dirt. Rather than pacing impatiently, I use the waiting time to drink water, check my surroundings and look for landmarks that might line up with the eventual east west line.
After roughly ten minutes, I return and mark the new position of the shadow tip with a second stone. A survival guide that walks through this process notes that you then draw a straight line between the two marks, which gives you a usable east west reference. One detailed explanation begins with the phrase Despite its quirks, though, you can still use the sun to get your bearings and then walks through the same sequence of planting a straight stick, marking the top of the shadow, waiting, and marking again. Once that line is visible, I stand with the first stone on my left and the second on my right, which turns my body toward north and lets me choose a direction of travel with far more confidence than guesswork.
Shortcuts and common mistakes with Sun based direction finding
Under pressure, people often try to rush the process and end up with misleading lines. One common mistake is not planting the stick straight, which can skew the shadow just enough to matter over distance. Another is failing to wait long enough between the first and second marks, especially when the Sun is high and the shadow moves slowly. If the two stones sit almost on top of each other, the line between them will be unreliable. I have also watched people forget which stone came first, then reverse east and west entirely.
Some instructors suggest a simple memory aid: Place your first stone and quietly say “first west,” then Wait a full ten minutes before you drop the second stone, so the movement is clear. Others remind students to repeat the process if clouds roll in halfway through and blur the shadow. A short reel that begins with the words To create a shadow compass in the Northern Hemisphere you need a sunny day a straight stick and a flat patch of ground stresses that even a small stone or scratch in the dirt can serve as a reliable mark if you stay patient. The shortcut, in other words, is not to skip steps, but to practice the full method when you are calm so it feels automatic when you are not.
When the Sun disappears: turning to Polaris and the Big Dipper
Cloud cover, dense forest or nightfall can all remove the Sun from your toolkit, which is when the stars take over. In the Northern Hemisphere, Polaris, often called the North Star, sits close to the point in the sky that the entire firmament seems to spin around. That fixed position makes it a powerful reference for direction, even though Polaris is not the brightest star overhead. One educational guide notes that Its significance to navigators is that it appears almost stationary while other stars wheel around it through the night.
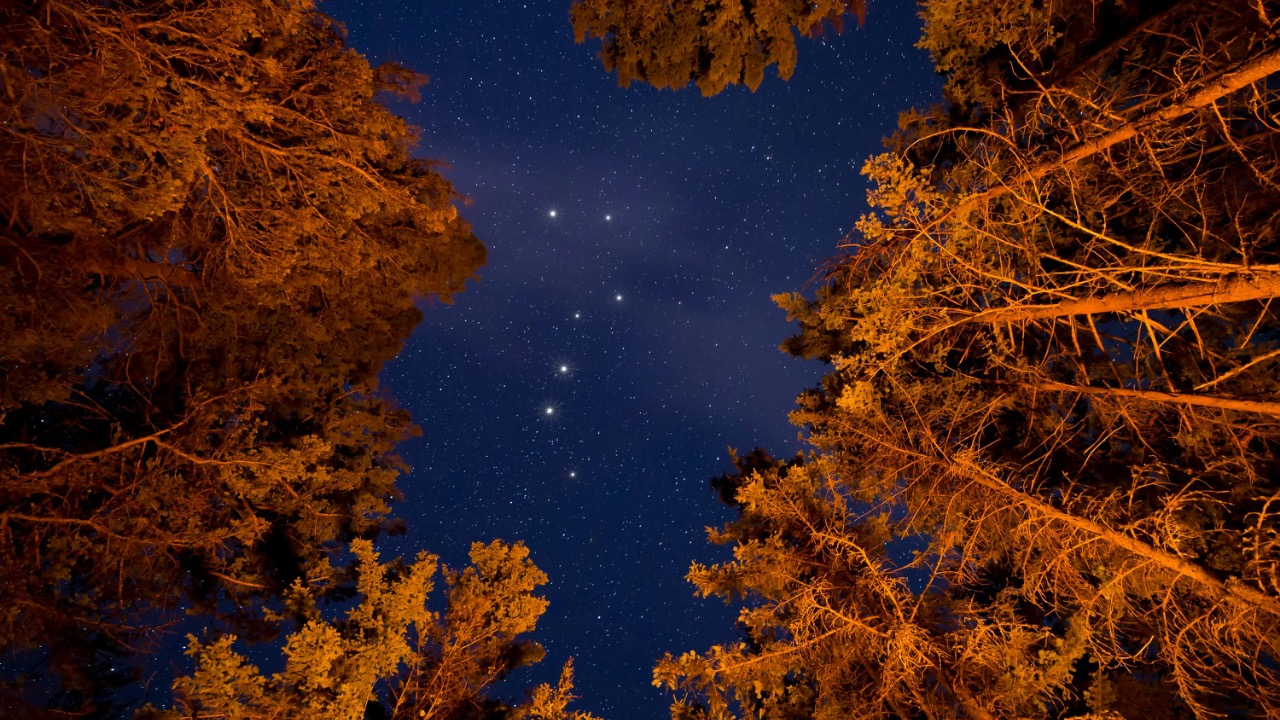
Finding Polaris quickly depends on a familiar pattern. Start by facing the north half of the sky and Try to pick out the Big Dipper, also known as Ursa Major, which looks like a large ladle or saucepan. Several astronomy educators describe how the two stars at the “bowl” end of the Big Dipper (Ursa Major), the two furthest from the handle, line up to point almost directly at Polaris, the North Star. If you draw an imaginary line through those two “pointer” stars and extend it about five times the distance between them, you land on Polaris, which marks the direction of true north.
Practicing star finding so it feels natural in an emergency
Like any skill, star based direction finding works best if you have tried it on an easy night before you need it in a hard one. One stargazing guide titled Navigating the Northern hemisphere explains that The Big Dipper can be used reliably to find your way around the sky and around Earth as well, and that it is often one of the first things to jump out at you when you step outside on a clear night. Photographers describe moments when the Big Dipper, Ursa Major, seems to hover over a landscape, as in one account where the constellation appeared above a rock face while northern lights lit the scene.

Leo’s been tracking game and tuning gear since he could stand upright. He’s sharp, driven, and knows how to keep things running when conditions turn.